How to Improve Germination Rates for Better Seedling Success
There’s something magical about planting a seed and watching it sprout. Every spring, I feel that familiar excitement as I press tiny seeds into the soil, already imagining lush green leaves and vibrant flowers.
But I’ve also had my fair share of frustration, seeds that refused to sprout, seedlings that started strong but then withered away, or trays that ended up patchy with uneven growth.
When I first started gardening, I thought germination was as simple as burying a seed, adding water, and waiting. But I quickly learned that not all seeds are created equal, and their success depends on a mix of temperature, moisture, soil quality, and timing.
Over the years, I’ve fine-tuned my approach, and now my germination rates are higher than ever. If you’ve ever struggled with slow, uneven, or failed seed starts, here’s what I’ve learned to get strong, reliable seedlings every time.
Start with High-Quality Seeds
I used to pick up whatever seed packets looked interesting, not realizing that seed quality makes a huge difference. Some of my biggest germination failures happened when I planted old or poorly stored seeds that had lost their viability.
Now, I always check seed packets for expiration dates and try to buy from trusted sources that store their seeds in optimal conditions.

If I’m using seeds from previous seasons, I do a simple germination test before planting.
I take a few seeds, place them in a damp paper towel, seal them in a plastic bag, and keep them in a warm place for a few days. If less than half sprout, I know I need fresh seeds to ensure a better success rate.
Pre-Soak or Pre-Sprout Tough Seeds
Some seeds are notoriously slow or stubborn to germinate. The first time I tried growing parsley, I waited three weeks for it to sprout and thought I had done something wrong. Later, I learned that soaking certain seeds before planting speeds up the process significantly.
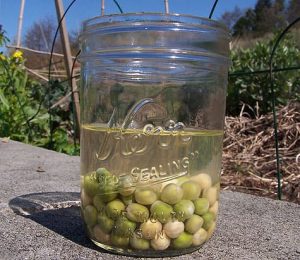
Now, I soak hard-coated seeds like peas, beans, beets, and nasturtiums in warm water for a few hours or overnight before planting. For extra tough seeds, like morning glories or sweet peas, I gently nick the seed coat with a nail file to help moisture penetrate faster.
Sometimes, I even pre-sprout seeds by placing them between moist paper towels until I see the first tiny root, then carefully transferring them into soil. This ensures I’m only planting seeds that are already alive and ready to grow.
Provide the Right Temperature
I used to think seeds would germinate whenever they were planted, but temperature plays a much bigger role than I realized. Some seeds need warmth to sprout, while others prefer cooler conditions.
Warm-season crops like tomatoes, peppers, and eggplants need soil temperatures between 70-85°F (21-29°C) to germinate well. If I start them indoors, I use a seedling heat mat under my trays to provide steady warmth. Without it, germination can be slow and uneven.
Cool-season crops like lettuce, spinach, and peas prefer temperatures between 50-65°F (10-18°C). If it’s too warm, they either germinate poorly or don’t sprout at all. One mistake I made early on was trying to start spinach indoors in a warm room, only to see very few seedlings emerge.
Keep Soil Moist, But Not Too Wet
I’ve learned that the key to good germination is consistent moisture, not too dry, not too wet. If the soil dries out, the seed’s growth stalls. If it’s too wet, the seed can rot before it ever sprouts.
When starting seeds indoors, I water my trays from the bottom by placing them in a shallow dish of water. This keeps the top layer from getting too soggy, while ensuring the roots get enough moisture.
Outside, I make sure to water lightly and often until seedlings emerge. A fine mist or gentle sprinkle is best, so the soil stays evenly damp without washing the seeds away.
To keep moisture levels steady, I sometimes cover seed trays with a humidity dome or plastic wrap until the first sprouts appear. Outdoors, I use a light layer of straw or fabric row covers to prevent the soil from drying out too quickly.
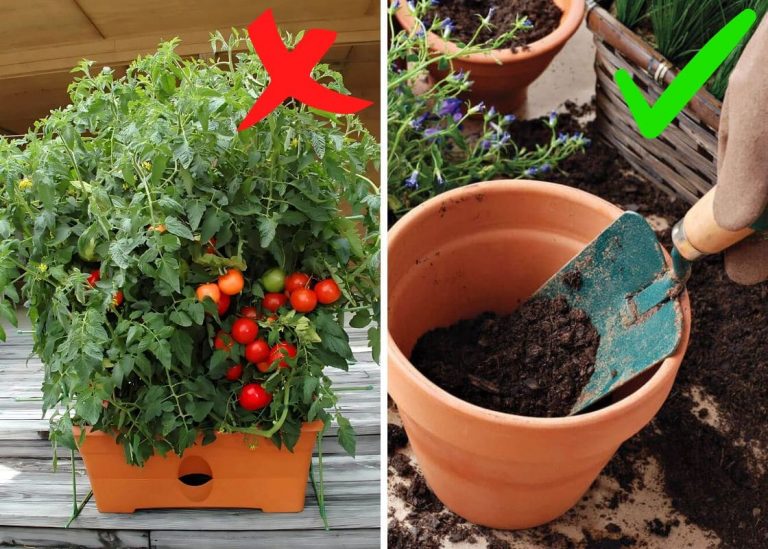
Use the Right Soil for Germination
One of my early mistakes was using heavy garden soil for seed starting. I thought it would work just fine, but the compacted texture made it hard for delicate roots to push through. Now, I use a light, well-draining seed-starting mix that retains moisture without getting soggy.
For small or delicate seeds, I gently press them onto the soil surface rather than burying them too deep. Some seeds, like lettuce and petunias, need light to germinate, so covering them with too much soil prevents them from sprouting.

Give Your Seedlings Proper Airflow and Light
Once seeds germinate, I make sure they get plenty of airflow to prevent mold and damping-off disease, a fungal infection that kills young seedlings before they have a chance to grow.
I use a small fan indoors to keep air moving, and I make sure seedlings are spaced out so they don’t create a damp, overcrowded environment.
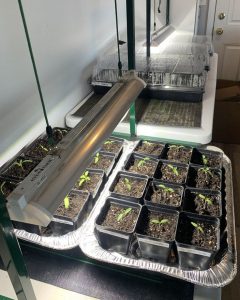
Light is just as important. If seedlings don’t get enough bright light, they grow tall and weak, reaching for the nearest window. I’ve had many seedlings turn into leggy, floppy stems before realizing they needed stronger light.
Now, I use grow lights when starting seeds indoors and make sure they get at least 12-16 hours of bright light per day.
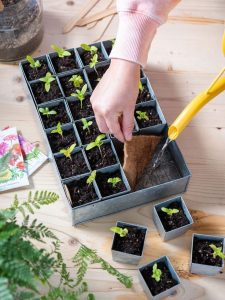
Transplanting at the Right Time
Once seedlings are growing strong, I make sure to harden them off before transplanting them outdoors. I used to make the mistake of moving seedlings straight from my warm indoor setup to the garden, only to see them wilt under the sudden sun and wind.
![]()
Now, I gradually introduce them to outdoor conditions over 7-10 days, starting with a few hours in the shade before exposing them to direct sun and wind.
By the time I transplant them, they’re stronger, sturdier, and ready for the real world.