25 Must-Try DIY Easter Home Decor Ideas to Brighten Your Season
Every Easter, as soon as that gentle breeze carries the scent of blossoming flowers into my garden, I find myself lost in memories of spring mornings. There’s something magical about watching the earth wake up—fresh green shoots poking through soil, birds chattering at dawn, and the anticipation of family gathering in our sunlit kitchen. My fondest childhood memory is hunting for hand-painted eggs under my grandmother’s lilac bushes, kneeling in the dew-soaked grass, laughing with cousins while pastel ribbons fluttered in the wind. My mother’s porch always sparkled with little touches—woven baskets filled with violets, a smiling bunny by the gate, and a wreath that told the world, “Welcome, spring!”
As I grew older, I started adding my own spin—mixing wildflowers from my backyard into centerpieces, reusing old jars for Easter candle lanterns, and inviting friends to help craft decorations on breezy Saturday afternoons. Those simple DIY projects have become yearly traditions. To me, making Easter décor isn’t just about sprucing up the house—it’s about slowing down, getting my hands dirty, and infusing every corner with the joy of renewal.
If you, like me, crave that feeling of connection—of bringing the outdoors inside and celebrating nature’s return—I’m here to share ideas that will make your home sing with spring. In this post, you’ll find 25 DIY Easter home decor ideas that bring warmth, joy, and festive cheer to every corner of your home. Whether you want to add whimsy to your porch, transform your dining table, or tuck surprises among your flowers, you’ll find something here to spark your creativity and bring your family together.
#1. Floral Bunny-Themed Front Porch Display
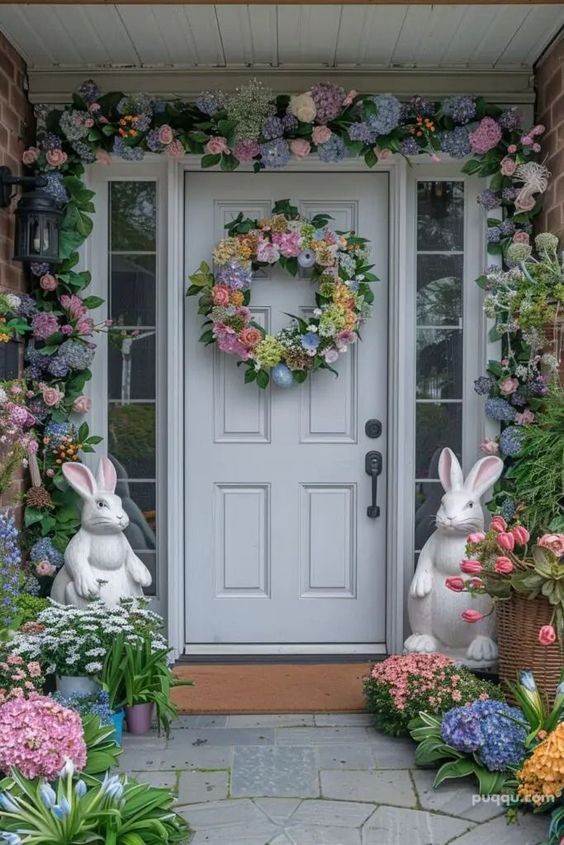
You’ll fall in love with this enchanting floral bunny-themed front porch display!
The gorgeous pastel wreath, surrounded by lush garlands and vibrant blooms, creates a welcoming, springtime atmosphere. Two adorable bunny statues frame the entrance, adding a whimsical touch.
Tip: If your porch gets a lot of wind, use florist wire to secure the garland and wreath in place. And don’t be afraid to use real flowers—just keep a spray bottle nearby to mist them on warmer days.
#2. Green Springtime Easter Tablescape

On the table, a refreshing green springtime Easter tablescape comes to life! Elegant green glassware, polka-dotted napkins, and nature-inspired centerpieces set the stage for a cheerful celebration.
The charming bunnies, mini eggs, and soft greenery along the runner bring a cozy, festive vibe.
Materials Needed:
-
Green-tinted glassware (or clear glasses wrapped in green ribbon)
-
Polka-dotted cloth napkins (preferably in pastels)
-
1 white or light green table runner
-
Centerpiece items: mini clay pots, faux moss, small Easter figurines (bunnies, chicks)
-
Fresh or faux greenery (mint, ferns, eucalyptus)
Step-by-Step Guide:
-
Lay out your table runner and space your glassware evenly.
-
Fold the napkins with a soft triangle or tuck them into mini baskets for extra charm.
-
Line the center of the table with moss, small figurines, and scattered eggs.
-
Place tiny potted herbs or flowers between settings to add fragrance and texture.
-
Light a few unscented tea candles to give everything a soft glow.
Note: If you don’t have polka-dotted napkins, make your own with fabric paint and a pencil eraser—quick, fun, and totally customizable.
#3. Bright Pastel Easter Mantel Display
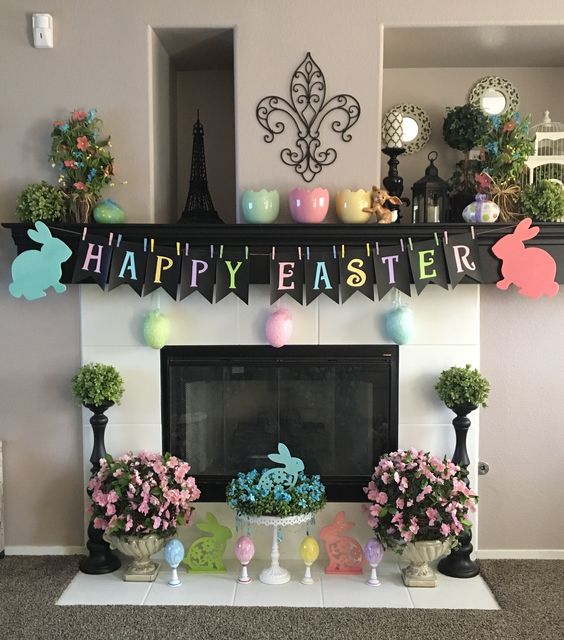
My mantel used to be a forgotten shelf—but not anymore. A few years back, I strung up a pastel banner I made from old cardstock, added some faux tulips in mason jars, and tucked in wooden bunny cutouts I painted on a rainy afternoon. It instantly became the heart of my Easter setup.
Materials Needed:
-
DIY or store-bought pastel bunting/banner
-
Wooden bunny silhouettes (about 8–10 inches)
-
Small jars or vases with faux or fresh flowers
-
Decorative pastel eggs
-
Miniature picket fences or grass mats (optional)
Step-by-Step Guide:
-
Start by hanging the banner along the mantel edge using twine or command hooks.
-
Arrange the bunny cutouts at varied heights using stacked books or boxes.
-
Place jars filled with flowers in between for color balance.
-
Scatter pastel eggs along the mantel and nestle them into tufts of moss.
-
Add a few unexpected touches—like a butterfly clip or a tiny sign that reads “Hop Here.”
Alternative: If you don’t have a mantel, recreate this setup on a shelf, window sill, or even a narrow hallway table.
#4. Charming Floral Basket Door Decor
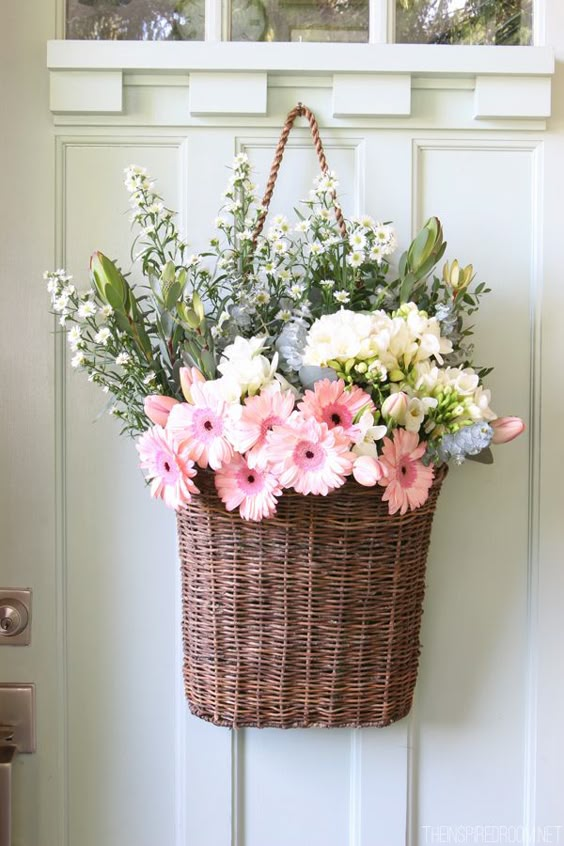
I believe this delightful floral basket is the perfect Easter greeting for your front door. Overflowing with soft pink daisies and lush greenery, it adds a welcoming and fresh touch.
Its rustic woven basket creates an effortlessly charming, spring-inspired look that’s both warm and elegant.
Materials Needed:
-
Medium woven basket (12–14 inches wide)
-
Faux or fresh flowers: pink daisies, lavender, baby’s breath
-
Faux greenery (ferns or ivy)
-
Floral foam or damp paper towel if using fresh stems
-
Ribbon or twine for hanging
Step-by-Step Guide:
-
Fill the bottom of the basket with floral foam or crumpled newspaper to anchor your arrangement.
-
Begin with the greenery, letting some spill naturally over the edges.
-
Add in your main blooms, clustering them for fullness and height.
-
Tuck in smaller accents like baby’s breath for a soft finishing touch.
-
Tie a wide ribbon or looped twine around the handle, then hang on your door hook.
Tip: Refresh the arrangement every week with snips from your garden to keep it seasonal. I like to add sprigs of rosemary and thyme for a garden-fresh scent.
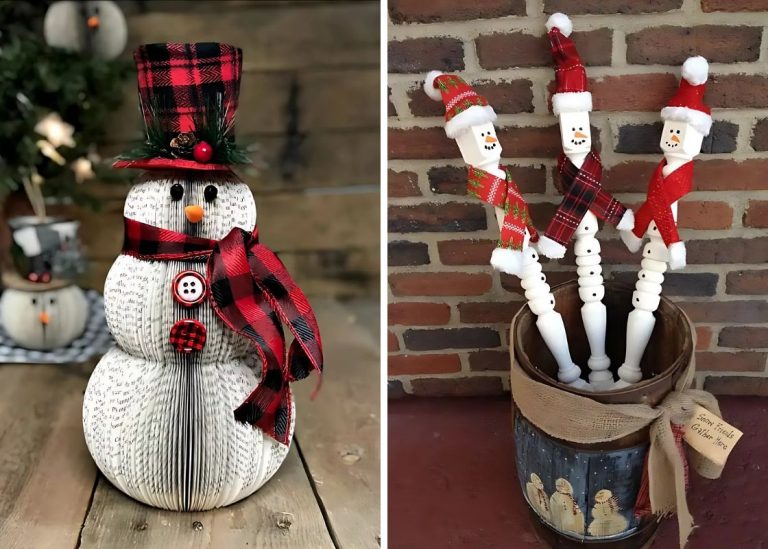
#5. Adorable Wooden Bunny Family
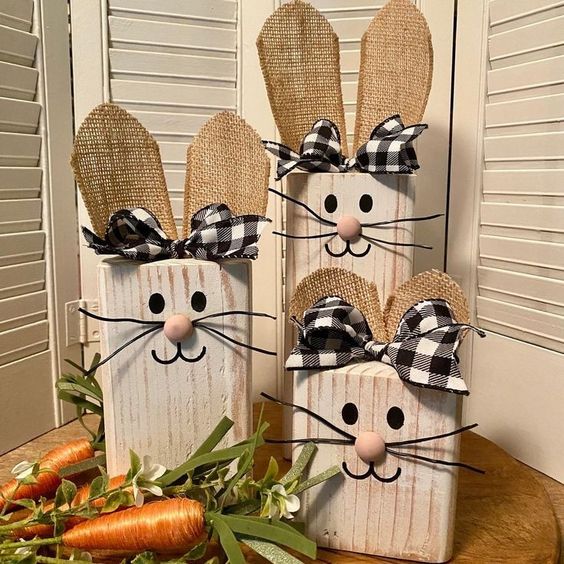
This project was a rainy-day miracle. I found leftover scrap wood in the shed, traced out three bunny shapes, and let my kids help sand and paint them. We added burlap ears and plaid bows—and just like that, we had a bunny family standing by the fireplace.
Materials Needed:
-
3 pieces of wood cut into bunny shapes (12″, 16″, 20″)
-
White or pastel acrylic paint
-
Burlap fabric (for ears)
-
Small checked or gingham ribbon
-
Hot glue gun and sandpaper
Step-by-Step Guide:
-
Sand each wooden bunny until smooth, especially the edges.
-
Paint each one with your chosen color and allow to dry completely.
-
Cut burlap into ear shapes and glue to the back of each bunny head.
-
Tie a ribbon bow around each neck and secure with glue.
-
Optional: Paint tiny whiskers or add a pom-pom tail for fun.
Note: These also look adorable nestled among your potted plants or peeking out from a flowerbed!
#6. Elegant Egg Wreath
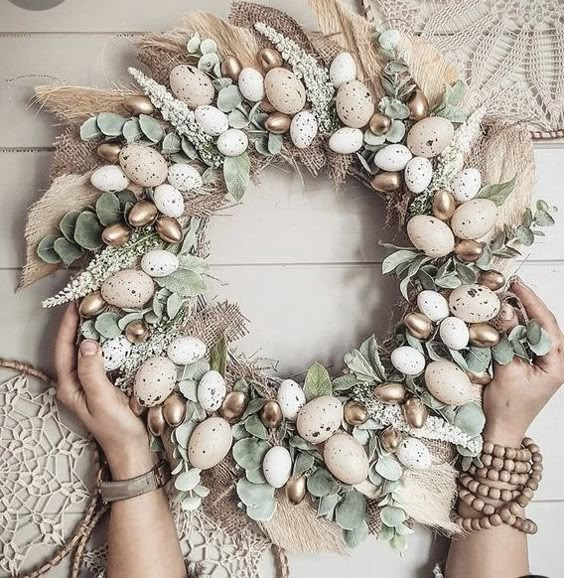
I think this elegant egg wreath is a stunning centerpiece for your Easter decor.
Featuring soft pastels, speckled eggs, and delicate greenery, it exudes a natural and serene vibe.
Materials Needed:
-
14–16″ grapevine wreath base
-
20–25 speckled plastic or painted wooden eggs in soft pastel tones
-
Faux or dried greenery (eucalyptus, thyme, olive branches)
-
Hot glue gun
-
Floral wire (optional)
-
Satin or linen ribbon for hanging
Step-by-Step Guide:
-
Begin by placing your greenery around the wreath, tucking stems between vines or securing them with floral wire. Let the leaves spill out naturally.
-
Gently glue eggs into the nest of greenery. Try not to space them too evenly—randomness feels more organic.
-
Once your eggs are in place, tuck in dried blooms or herbs like lavender for scent and texture.
-
Finish with a soft ribbon loop or bow for hanging.
Tip: If you’re displaying outdoors, consider using weather-resistant faux materials, and coat the eggs with clear spray sealant to protect against sun and moisture.
#7. Charming Tulip Basket Display
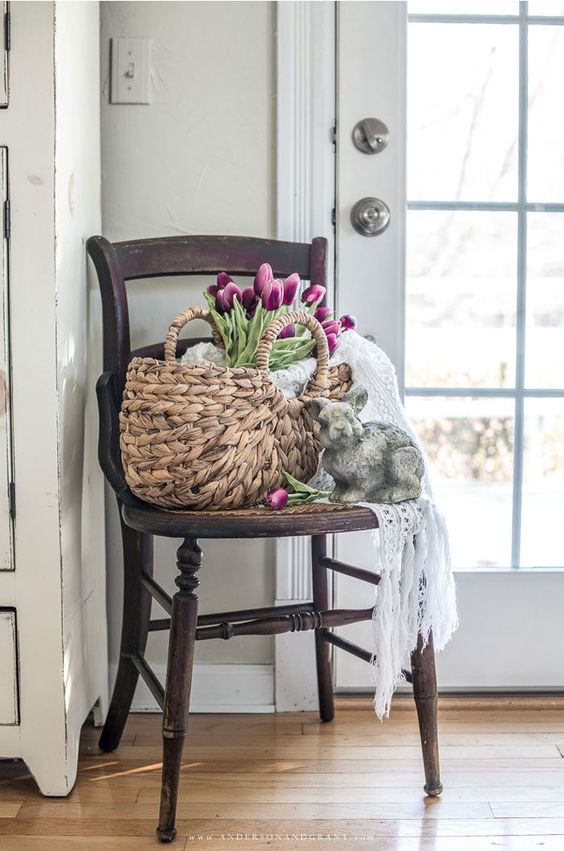
By placing a rustic woven basket filled with vibrant tulips on a vintage chair, you effortlessly bring spring vibes into your home.
The soft greenery, paired with a delicate bunny figurine, creates a cozy and inviting scene.
Materials Needed:
-
Medium-sized rustic basket or crate (about 12–14″ wide)
-
Fresh or high-quality faux tulips (10–12 stems)
-
Straw, dried moss, or raffia for filling
-
1 small ceramic or wooden bunny figurine
-
Optional: vintage chair or crate to elevate the display
Step-by-Step Guide:
-
Line the basket with moss or straw to give your tulips a cozy bed.
-
Trim stems if needed, then insert the tulips at various angles—don’t overcrowd.
-
Nestle the bunny into one corner, peeking through the blooms.
-
Place the entire basket on a chair, stool, or crate to elevate it for display.
Note: Fresh tulips will droop over time—don’t fight it. That soft curve is part of their charm. Replace with faux blooms once they fade to keep the display going longer.
#8. Adorable Bunny and Carrot Garland
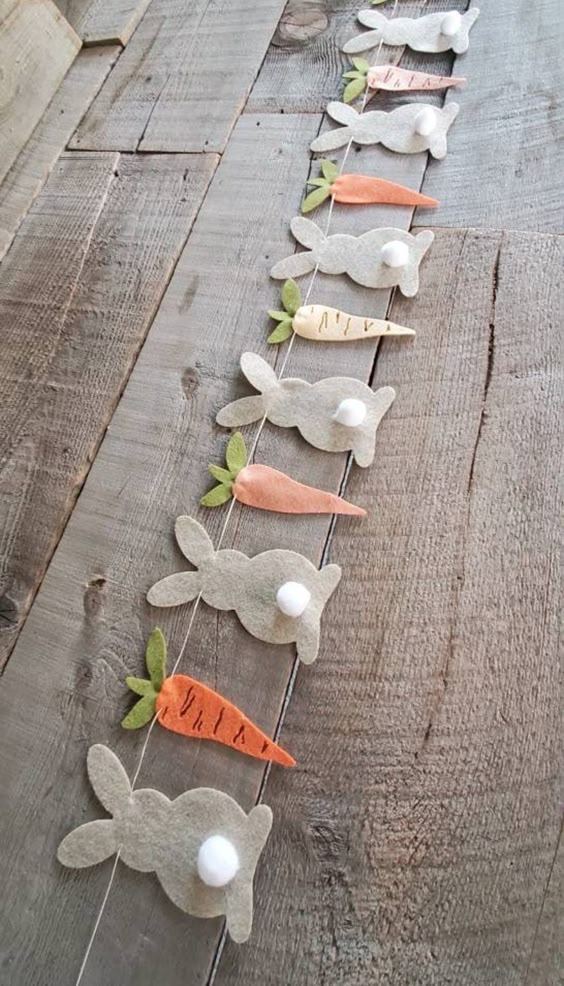
Don’t worry if you’re looking for something cute and easy for Easter!
This felt bunny and carrot garland will brighten any space with its soft textures and playful charm.
Materials Needed:
-
Felt sheets in white, orange, and green
-
Twine or jute string
-
Fabric glue or hot glue gun
-
Scissors and optional templates
-
Mini pom-poms (for bunny tails)
-
Hole punch or sewing needle
Step-by-Step Guide:
-
Cut out simple bunny and carrot shapes (about 4–6 inches tall). Make about 8–10 of each.
-
Add a pom-pom tail to each bunny, and glue green felt leaves to the carrot tops.
-
Punch small holes at the top of each figure or thread a needle through the felt.
-
String them onto the twine, alternating bunny and carrot. Leave space between each.
-
Hang the garland across a mantel, window, or bookshelf for a cheerful accent.
Alternative: Add tiny letters to spell “Happy Easter” across the shapes for a more personalized touch.
#9. Colorful Easter Egg Topiaries
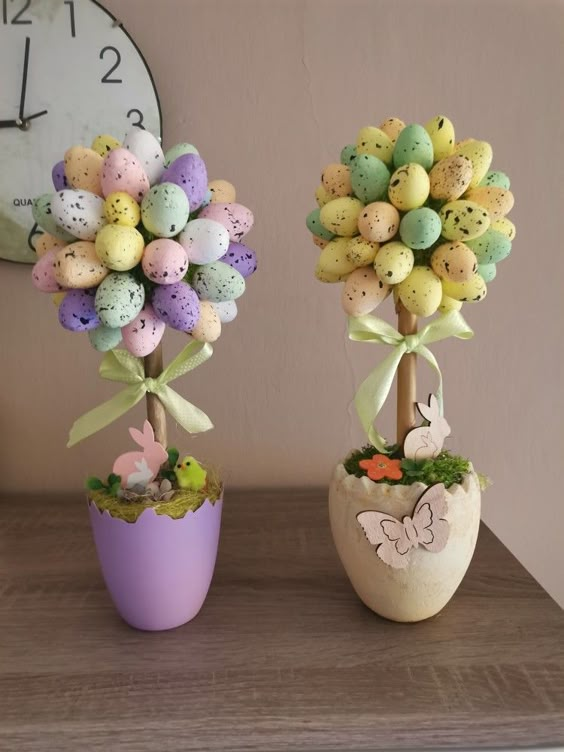
I first saw this idea in an old home and garden magazine tucked away in my aunt’s attic. I adapted it using a few terra-cotta pots I already had and a bowl of plastic eggs I wasn’t sure how to use. My niece helped glue the eggs onto foam cones, and when we placed them along the garden path, they looked like candy-colored trees sprouting from the soil.
Materials Needed:
-
Small terra-cotta pots (4–6 inches)
-
Foam cones (to fit inside pots)
-
Plastic or wooden pastel Easter eggs
-
Hot glue gun
-
Ribbon bows, raffia, or moss for trimming
-
Gravel or floral foam (to anchor cone in pot)
Step-by-Step Guide:
-
Insert the foam cone into the pot and secure it using floral foam or small stones.
-
Glue pastel eggs around the cone, starting at the base and working up in overlapping rows.
-
Fill in any gaps with moss or small flowers.
-
Wrap a ribbon around the pot or tie a bow on top for an extra festive flair.
Tip: For an outdoor version, use weather-safe glue and nestle the base into a planter bed for stability.
#10. Carrots-Inspired Rustic Wall Art

A few springs ago, I had leftover twine from tying tomato vines and more raffia than I needed. Inspired by the shape of carrots, I twisted the twine into tapered cones and added green raffia tops. I glued them to an old wooden panel I found behind the shed. Hung in the hallway, it felt like a quirky little nod to the season—homegrown and handmade.
Materials Needed:
-
Twine (natural jute or hemp)
-
Green raffia or faux grass
-
Cardstock cones or cardboard to shape the carrots
-
Hot glue gun
-
Wooden board or reclaimed pallet (about 12×18 inches)
-
Optional: small burlap bow or sign
Step-by-Step Guide:
-
Shape cardboard into a carrot form and wrap tightly with twine, gluing as you go.
-
Add a tuft of green raffia at the top, fanning it out for volume.
-
Repeat to make 3–4 carrots.
-
Attach each carrot to the wooden board in a vertical or diagonal layout.
-
Finish with a rustic bow or a small hand-lettered tag like “Fresh Picked.”
Note: This is a perfect piece to hang near the kitchen or garden shed—it carries that cozy, farmer’s-market vibe without trying too hard.
#11. Colorful Easter Egg Tree
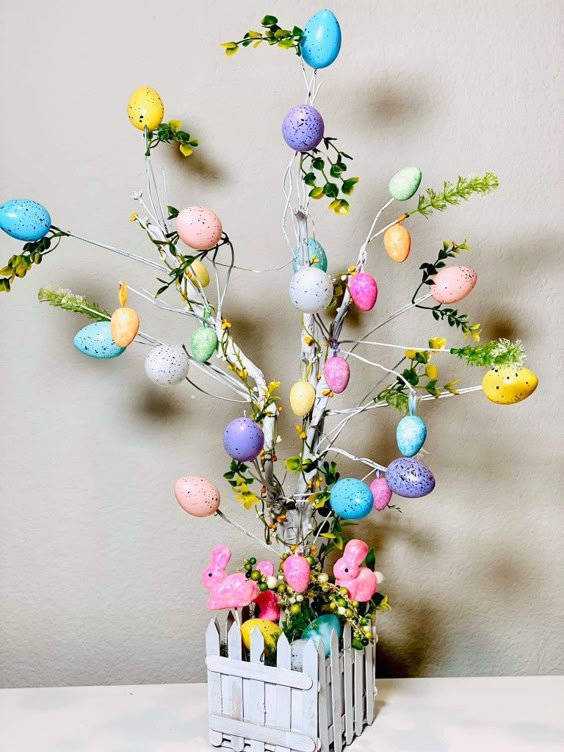
This idea came to life when my nephew ran through the garden clutching a basket of plastic eggs, yelling, “We forgot the tree!” I didn’t know what he meant until he started hanging them on the lilac branches. It was unexpected—and perfect. The tree sparkled with pastel colors, and suddenly Easter had taken root right in our backyard.
Materials Needed:
-
12–15 plastic or wooden pastel Easter eggs with string loops
-
A bundle of bare branches (white-painted or natural)
-
Sturdy vase or decorative container
-
Floral foam or small stones for support
-
Optional: LED fairy lights, faux blossoms, or moss
Step-by-Step Guide:
-
Arrange your branches in a heavy vase, anchoring them with floral foam or pebbles for balance.
-
Hang the Easter eggs at varied heights to create movement.
-
Weave in fairy lights or sprigs of faux cherry blossoms if desired.
-
Cover the base with moss or fabric for a tidy, natural look.
Tip: This makes a lovely entryway display or dining table centerpiece. Use real foraged branches if you can—they add an organic touch that feels grounded and fresh.
#12. Antique Blooming Chalkboard Display
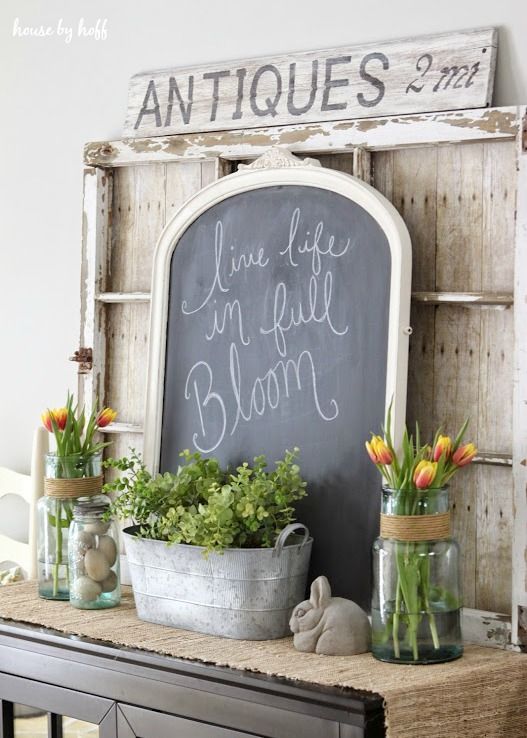
This sign perfectly blends vintage charm with a touch of springtime freshness!
The rustic chalkboard paired with bright tulips and a galvanized planter creates a warm, welcoming aesthetic for your home.
Materials Needed:
-
Vintage or DIY chalkboard
-
Galvanized planter or rustic bucket
-
Fresh tulips or faux blooms (8–10 stems)
-
Chalk (white or pastel)
-
Optional: miniature sign, watering can, or fabric scraps
Step-by-Step Guide:
-
Lean or hang the chalkboard in a hallway, on the porch, or beside a garden bench.
-
Fill your planter with fresh flowers and set it directly beneath the board.
-
Write a seasonal quote or a simple doodle (flowers, birds, or eggs) to tie the look together.
-
Add texture around the base with a folded quilt, straw mat, or a few stacked flower pots.
Note: Real tulips will need water—use a mason jar tucked inside the bucket to keep stems fresh without visible clutter.
#13. Pastel Easter Egg Wreath
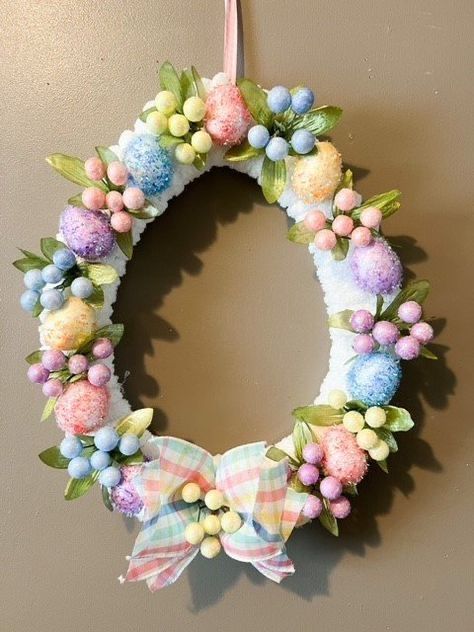
The color palette of this pastel Easter egg wreath is simply enchanting! With soft hues of pink, blue, yellow, and green, it offers a delicate charm to your entryway.
But what made it special wasn’t the perfection—it was the way the eggs clinked softly against each other in the breeze, like nature whispering that winter was finally behind us.
Materials Needed:
-
Foam or twig wreath base (12–14 inches)
-
Assorted pastel Easter eggs (20–30 total)
-
Faux leaves, small berries, and floral accents
-
Plaid or burlap ribbon
-
Hot glue gun
Step-by-Step Guide:
-
Arrange and glue the pastel eggs across the front of the wreath, layering for fullness.
-
Tuck in faux leaves and berries between gaps, using glue to hold them in place.
-
Attach a ribbon bow at the top or bottom and create a loop for hanging.
-
Add touches of moss or tiny blossoms for texture.
#14. Rustic Beaded Bunny Sign
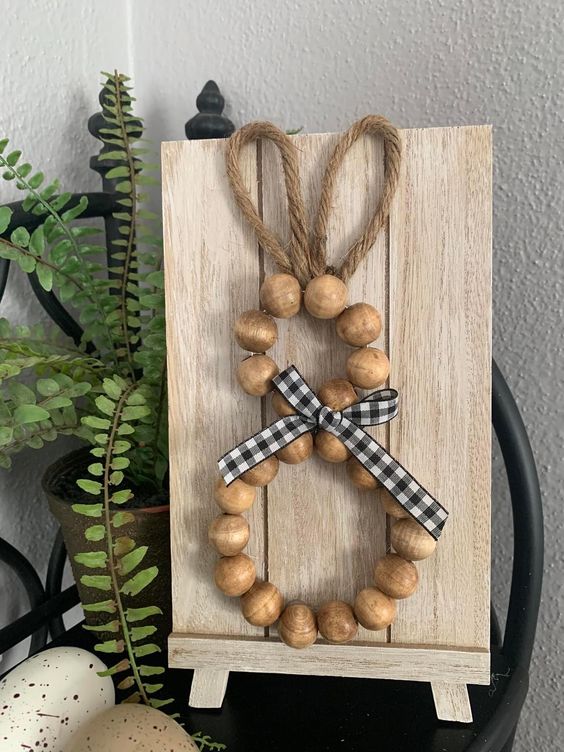
Inspired by nature’s simplicity, the rustic beaded bunny sign adds a cozy charm to your Easter decor. The wooden beads, paired with a jute string forming bunny ears, create a delightful yet understated look.
Topped with a black gingham bow, this handcrafted piece brings a farmhouse feel to any corner.
Materials Needed:
-
25–30 natural wood beads (¾ inch size)
-
Strong twine or wire
-
Jute twine or rope for bunny ear shape
-
Hot glue gun
-
Gingham ribbon or fabric strip (for bow)
Step-by-Step Guide:
-
String the beads onto wire or thick twine to form a circular base.
-
Twist jute into two looped ear shapes and glue to the top inside of the circle.
-
Add a bow just below the ears.
-
Hang using an extra loop of twine or display against a window or cabinet.
Alternative: Paint the beads white or soft pink for a more playful version, or leave them raw for that pure rustic feel.
#15. Rustic Floral Wooden Blocks

I’ve always had a soft spot for scraps of wood. These blocks were salvaged from a broken garden bench. I sanded them down, painted soft pastel backdrops, and glued on faux roses and bits of greenery from my craft bin. Set in a row, they looked like spring had written its name in flower script.
Materials Needed:
-
3–4 small reclaimed wood blocks (4–6 inches tall)
-
Chalk paint in pastel tones
-
Faux flowers: roses, baby’s breath, eucalyptus
-
Hot glue gun
-
Sandpaper
-
Optional: stencils or stamps for lettering
Step-by-Step Guide:
-
Lightly sand the wooden blocks for a smooth finish, leaving some texture for charm.
-
Paint each block in a different pastel shade and let dry.
-
Arrange and glue flowers to one side, allowing petals and leaves to spill naturally.
-
Optional: Use a stencil to paint or stamp “Easter,” “Spring,” or “Bloom” on each.
Note: These blocks make lovely shelf or window decor—and they double as sweet placeholders if you’re setting a garden-inspired Easter table.
#16. Charming Fabric Carrot Bundle
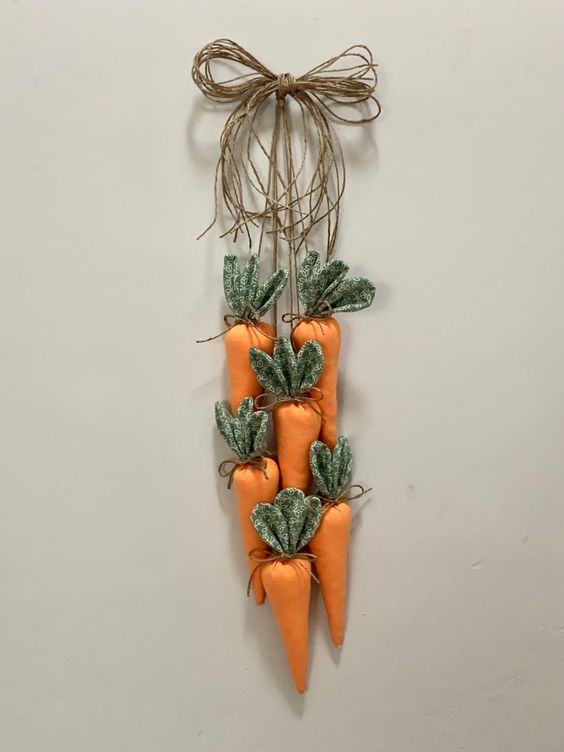
I first stitched these carrots on a stormy March evening when the rain refused to let up. I had some leftover orange fabric from an old apron and bits of green felt tucked in a drawer. When I tied the little bundle with twine and left it on the kitchen windowsill, it looked like a gift straight from the garden—playful, handmade, and entirely full of spring.
Materials Needed:
-
Orange cotton or linen fabric (scraps work perfectly)
-
Green felt or raffia for carrot tops
-
Polyfill or cotton stuffing
-
Jute twine
-
Needle and thread or hot glue
Step-by-Step Guide:
-
Cut the orange fabric into triangle shapes (about 6” long) and sew or glue the sides to form a cone.
-
Stuff each cone with filling, closing the top tightly around the green felt “leaves.”
-
Tie with twine to secure and add a rustic bow for charm.
-
Bundle 3–5 together with a final wrap of jute twine and set them near your entryway or hang them on a hook.
Tip: Use cinnamon sticks inside the stuffing if you want them to give off a warm, spicy scent every time someone passes by.
#17. Elegant Easter Egg Display
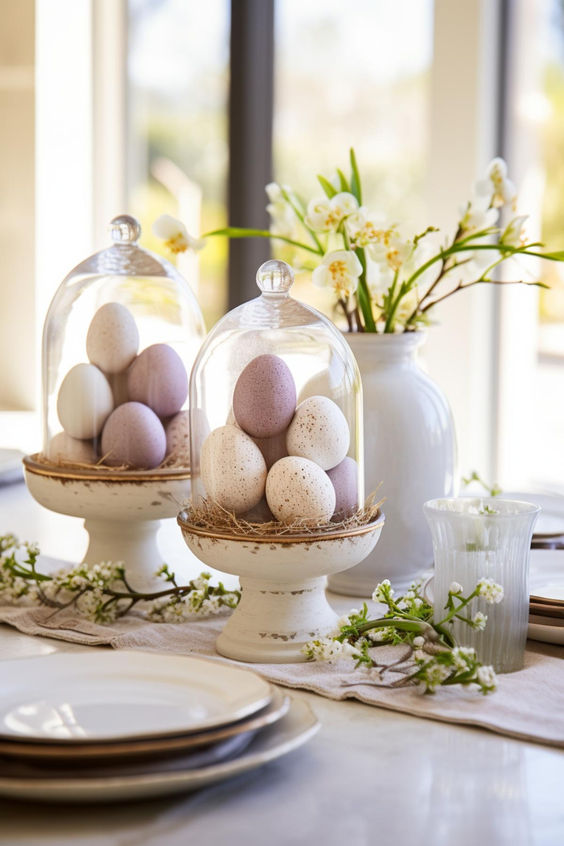
This setup of pastel Easter eggs encased in delicate glass domes is nothing short of elegant.
Each egg rests on a bed of natural straw, creating a sophisticated yet simple centerpiece for your table.
Materials Needed:
-
Glass cloches or large mason jars
-
Pastel-painted wooden or ceramic eggs
-
Straw, raffia, or shredded paper
-
Small wooden trays or saucers (optional)
Step-by-Step Guide:
-
Arrange a soft nest of straw inside the glass dome or jar base.
-
Gently place 3–5 eggs in the center, balancing them naturally.
-
Add tiny flowers or feathers for added detail.
-
Cover with the cloche or jar and set on a tray, wooden slice, or directly onto your table.
Note: These look beautiful grouped in threes on a mantel or spaced out along a dining table for subtle elegance.
#18. Rustic Floral Cross Display
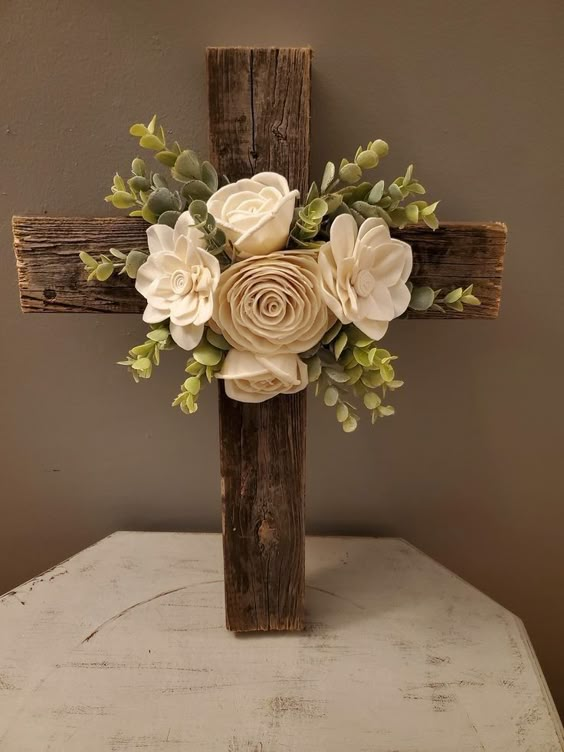
This project has a sacred kind of quiet to it. I made my first floral cross using twigs and jute after a long walk through the woods. I brought home soft blooms from the garden—pale pinks and creams—and fastened them gently across the wood. Placed in the hallway, it became a small altar of peace in our busy home.
Materials Needed:
-
Two small wooden slats or sturdy twigs (approx. 12–14″ long)
-
Jute twine or strong string
-
Faux or fresh flowers: roses, lilies, baby’s breath
-
Hot glue gun
-
Optional: wire loop for hanging
Step-by-Step Guide:
-
Form a cross using the two wood pieces and secure tightly at the center with twine.
-
Choose your flower placement—either a full cover or a side sweep for a modern feel.
-
Attach blooms using hot glue or floral wire, allowing leaves to drape.
-
Add a simple bow of twine or leave it bare for a more natural expression.
Tip: This piece can be laid flat as a centerpiece or hung above a doorway as a quiet reminder of renewal.
#19. Pastel Paper Egg Decorations
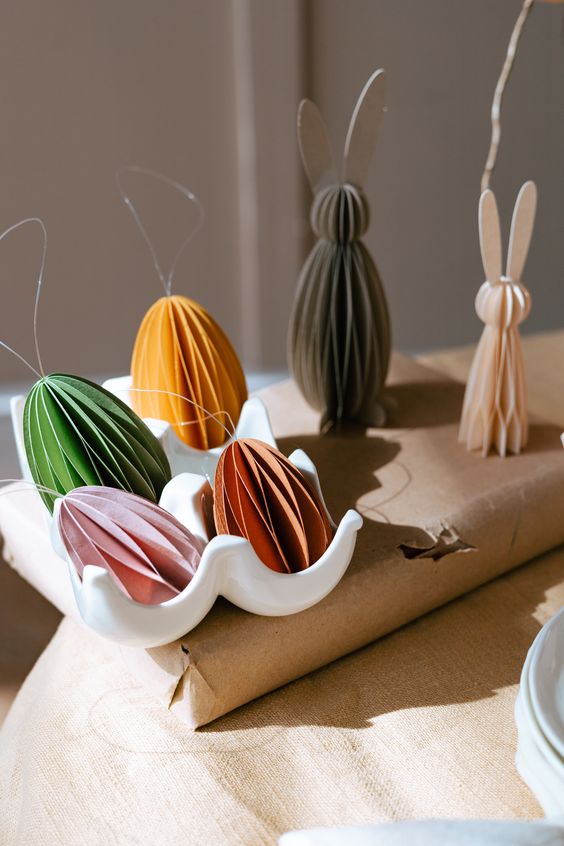
I used to keep a stash of old scrapbook paper, and when I needed a simple craft for visiting nieces one spring, these folded paper eggs saved the day. We strung them from branches, lined them along the windowsill, and some even ended up tucked into lunchboxes as sweet surprises.
Materials Needed:
-
Pastel cardstock or patterned scrapbook paper
-
Scissors and glue stick
-
Twine or thread (for hanging)
-
Hole punch
Step-by-Step Guide:
-
Cut egg shapes from the paper—at least 3 per ornament.
-
Fold each egg shape in half lengthwise, then glue the backs of each half together to form a 3D effect.
-
Punch a small hole at the top and thread with string for hanging.
-
Display on spring branches, curtain rods, or over mirrors for a soft, floating effect.
Alternative: Use old book pages or music sheets for a more vintage, poetic look.
#20. Rustic Script Egg Decor
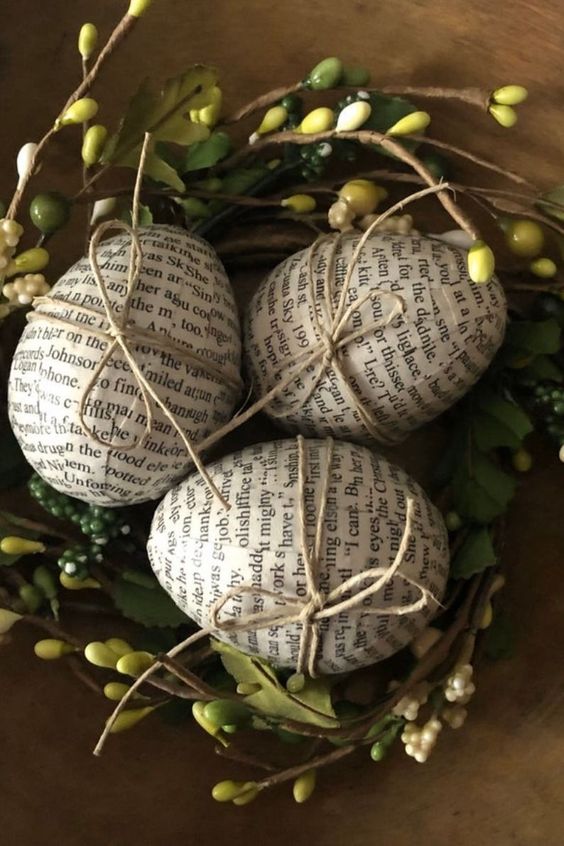
These charming eggs wrapped in vintage book pages exude a cozy, rustic vibe.
Tied with twine and nestled among greenery, they evoke a sense of nostalgia and creativity.
Materials Needed:
-
Plastic or wooden eggs
-
Torn strips of vintage book pages or newspaper
-
Mod Podge or white craft glue
-
Twine or lace
-
Small faux leaves or flowers (optional)
Step-by-Step Guide:
-
Apply glue to each egg and wrap book strips around, overlapping slightly.
-
Let dry completely, then add a sealant coat if using outdoors.
-
Tie a bit of twine or lace at the top for charm.
-
Nestle into a basket with moss, leaves, or baby’s breath.
Note: These eggs are a great way to recycle tattered books or sheet music—and they make thoughtful little gifts when placed in tiny nests or boxes.
#21. Easter Resurrection Garden
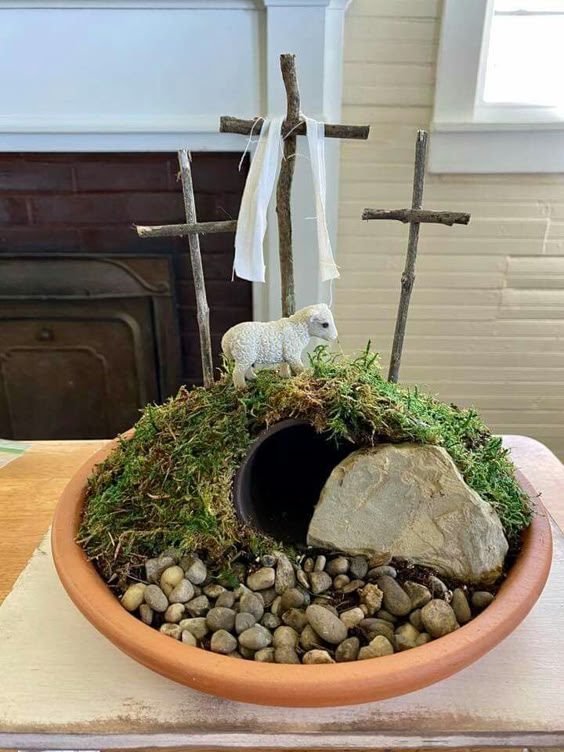
This piece has become more than décor—it’s a quiet ritual for me. I build it every year on Good Friday, just after tending the soil. The moss comes from the shaded corners of my backyard, and the tiny tomb is shaped from a cracked terra-cotta pot. I set it on a wooden tray by the windowsill. By Easter morning, the whole thing feels like it’s holding its breath—and then exhaling joy.
Materials Needed:
-
Shallow terra-cotta tray or wooden box (approx. 12–14″ wide)
-
Small clay pot turned on its side (to mimic a tomb)
-
Natural moss or grass
-
Small rocks or gravel
-
Miniature wooden cross
-
White cloth scrap (for draping)
-
Optional: lamb figurine or tiny flowers
Step-by-Step Guide:
-
Place the sideways pot in one corner of the tray to serve as the tomb.
-
Arrange moss around the base and up the sides, tucking in rocks and greenery.
-
Insert the cross in the soil or foam behind the tomb.
-
Drape a tiny piece of white fabric over the top of the tomb to signify the resurrection.
-
Add flowers, a small figurine, or candle for a soft, sacred touch.
Note: Keep this near a sunny window to let the moss thrive—or mist lightly to keep it fresh during Holy Week.
#22. Moss Bunny Topiary Delight
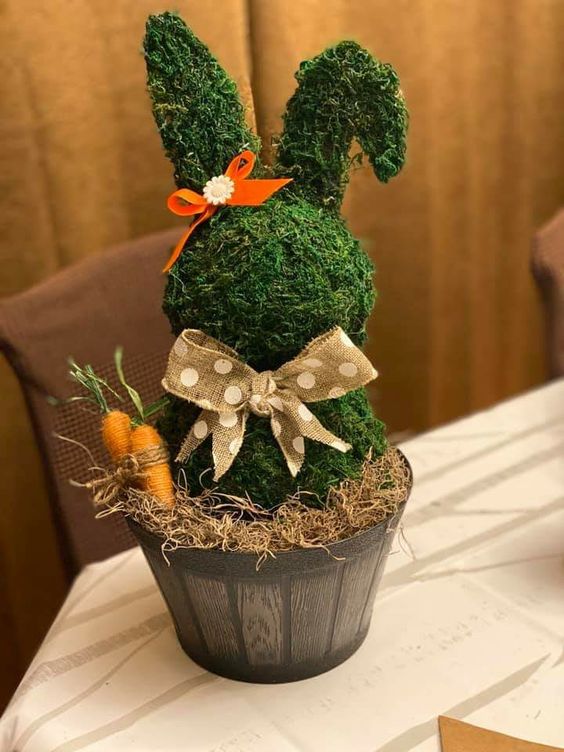
Your table or entryway will burst with festive charm thanks to this adorable moss bunny topiary.
Its earthy texture, accentuated by a playful polka-dot bow and tiny decorative carrots, brings the outdoors inside.
Materials Needed:
-
Cardboard or foam board bunny silhouette
-
Sheet moss or preserved moss
-
Hot glue gun
-
Small flowerpot or weighted base
-
Wooden skewer or stick
-
Decorative ribbon or fabric scraps
-
Optional: mini faux carrots or flowers for accent
Step-by-Step Guide:
-
Trace and cut your bunny shape from cardboard.
-
Cover the entire surface with glue and carefully press the moss into place.
-
Secure the bunny to a stick or skewer and insert into a flowerpot filled with foam or gravel.
-
Wrap a bow around the bunny’s neck or the pot base.
-
Decorate with small accents like raffia carrots or eggs.
Tip: For extra texture, mix in two types of moss—flat sheet and cushion varieties—so your bunny looks lush and lively.
#23. Rustic Bunny Wreath Decor
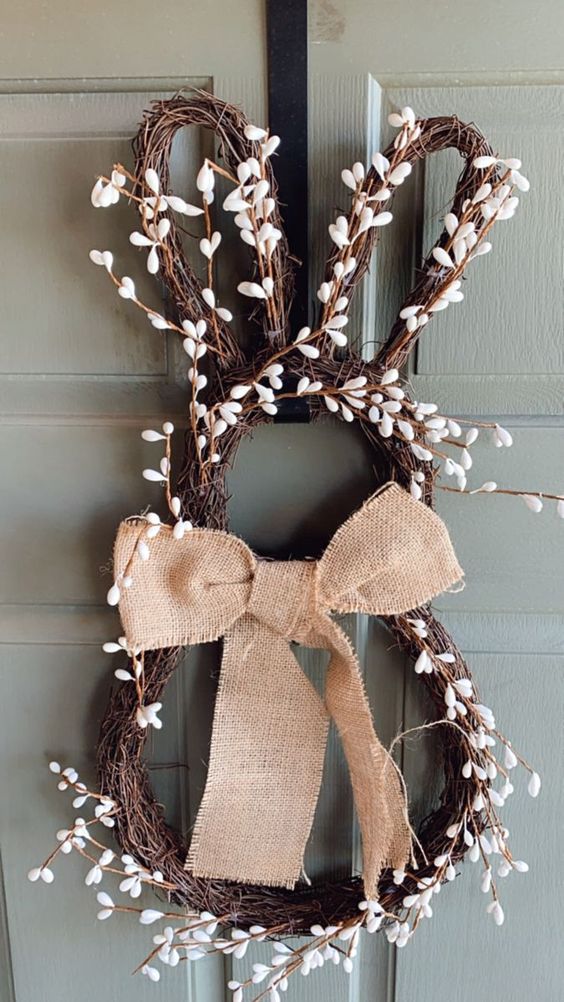
Sometimes the simplest pieces speak the loudest. This wreath was inspired by a tangle of vines I found while pruning grapevines in early spring. I shaped them into a bunny form, added a few sprigs of baby’s breath, and tied it all with a burlap bow. It hangs quietly on my garden gate, like a whisper that spring has arrived.
Materials Needed:
-
Grapevine wreath or wire base
-
Bendable twigs or vines for bunny ears
-
Faux baby’s breath or wildflowers
-
Burlap ribbon for bow
-
Hot glue gun or floral wire
Step-by-Step Guide:
-
Attach your bunny ears (twigs or smaller grapevine loops) to the top of the wreath using wire.
-
Add soft sprigs of baby’s breath around one side for a light, airy look.
-
Tie a burlap bow at the base or top, depending on your preferred style.
-
Hang on a door, gate, or even a chicken coop for a rustic spring touch.
Note: This looks best when it’s just a little imperfect. Let the twigs twist the way they want—you’re not forcing nature, just shaping it.
#24. Whimsical Easter Table Centerpiece
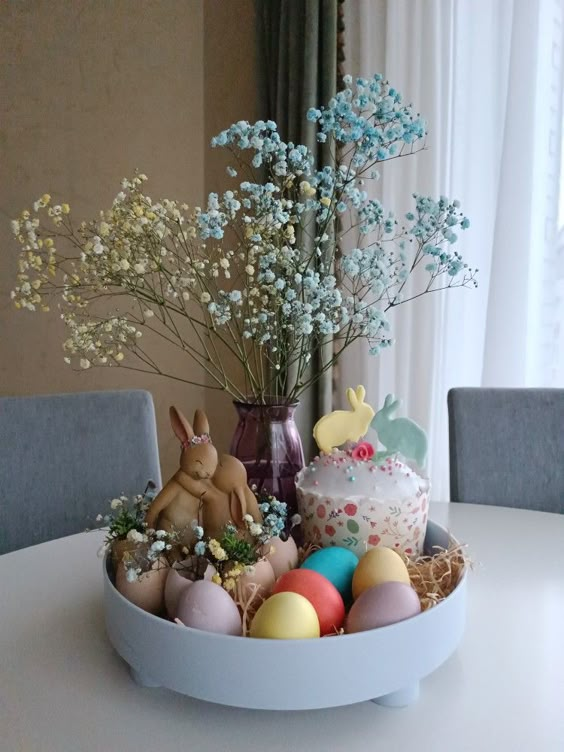
Who can resist the charm of this whimsical Easter table centerpiece?
With pastel-colored eggs, a sweet bunny figure, and delicate baby’s breath flowers, it brings a peaceful, festive touch to any dining table.
Materials Needed:
-
Small basket or vintage bowl
-
Pastel eggs (real, wooden, or painted plastic)
-
Baby’s breath or white wildflowers
-
Bunny figurine or tiny nest
-
Optional: ribbon scraps or miniature garden tools
Step-by-Step Guide:
-
Fill the base of your bowl with moss or straw.
-
Arrange eggs in a loose cluster off-center.
-
Tuck in sprigs of baby’s breath for softness.
-
Place your bunny in the mix—nestled like it belongs there.
-
Add tiny accessories like a paper sign (“hop,” “bloom,” or your family’s name) for whimsy.
Tip: This is a wonderful craft to make with children—they’ll love creating their own “Easter gardens” in teacups or cereal bowls.
#25. Rustic Easter Egg Basket
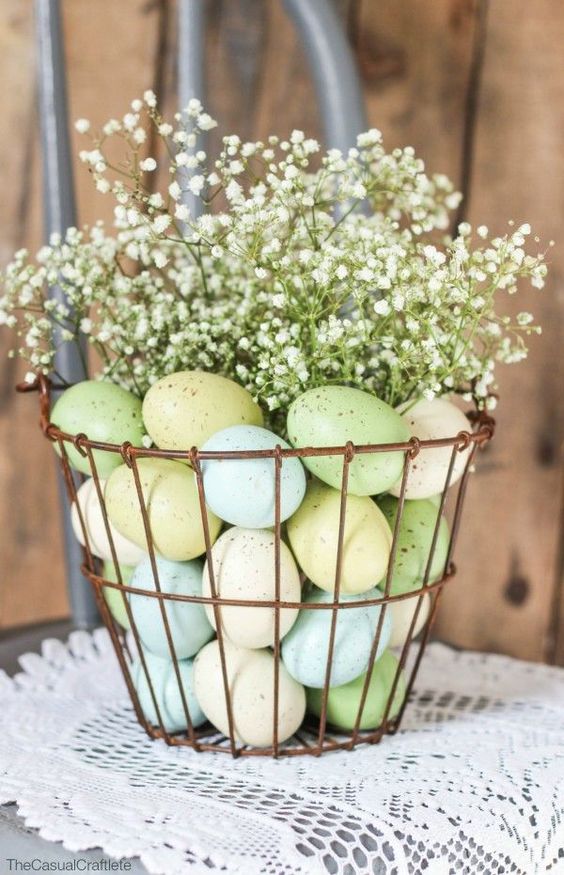
This last idea came together at the end of one long planting day. I was muddy, sun-tired, and ready to sit down. I grabbed a weathered basket and filled it with leftover pastel eggs from our table, then topped it with a handful of fresh baby’s breath I’d clipped near the back gate. I left it on the potting bench. The next morning, the sun caught it just right, and the whole thing glowed like a little celebration of ordinary beauty.
Materials Needed:
-
Woven basket (shallow or deep, depending on your space)
-
Faux or real pastel eggs
-
Fresh baby’s breath or lavender
-
Straw or moss for lining
-
Optional: linen napkin, ribbon bow
Step-by-Step Guide:
-
Line your basket with straw or a soft napkin.
-
Layer the pastel eggs naturally—no need to overthink the layout.
-
Tuck in baby’s breath between eggs and around the edge.
-
Add a ribbon bow or handwritten tag if you want to personalize it.
-
Set on a table, bench, or front steps where it can greet the day.
Note: For an herbal twist, mix in sprigs of rosemary or sage—both smell incredible and hold up beautifully through the season.
Final Thoughts
The beauty of Easter, and spring itself, isn’t in the perfection. It’s in the mess of moss on your hands, the way your garden tools still hold last season’s dirt, the laughter as you glue something slightly crooked—and love it anyway.
So take a moment, walk through your home, step outside, gather what speaks to you. Maybe it’s a broken teacup, a dusty ribbon, or a twig shaped just like a bunny’s ear. Whatever you find, let it bloom in your space. Because Easter is more than a day—it’s a feeling. And there’s nothing quite like bringing that feeling to life with your own two hands.